85% Hydration Sourdough: The Wet-Dough Technique That Actually Works
Why 85% Is a Different Game
At 75% hydration, you’re working with a cohesive, stretchy, slightly-sticky dough that follows familiar rules. At 85%, you’re working with something that looks like thick pancake batter when you first mix it — and still feels that way 45 minutes later.
The good news: 85% doughs bake into some of the most dramatic open-crumb loaves you’ll ever see. Holes the size of grapes. Glossy, shatter-crust exteriors. Tenderness that rips instead of crumbs.
The bad news: none of the techniques you use at 75% work at 85%. Stretch-and-folds tear the dough. Dry-hand shaping turns it to mush. If you try to apply standard sourdough method to this hydration, you’ll get a sad, flat puddle. Here’s what to do instead.
Prerequisites Before Attempting 85%
Don’t start here — work up to it. You should have:
- Consistent 75–78% bakes with good ear and open-ish crumb.
- A vigorous starter that doubles in 4–5 hours at room temperature.
- Bread flour (12.5% protein minimum) or a bread flour + gluten flour blend.
- A glass or clear plastic bulk container so you can see the side profile.
- A bench scraper and a small bowl for water.
If you’re new to high hydration, read our hydration step-up guide first.
Step 1: The Extended Autolyse (90+ minutes)
Mix just flour and water (no starter, no salt) and let it rest 90 minutes. Cover the bowl. This lets the flour fully hydrate and develops initial gluten passively.
At 85%, this step isn’t optional. Skip it and the dough never comes together in stretch-and-folds — you’re adding starter to under-hydrated flour.
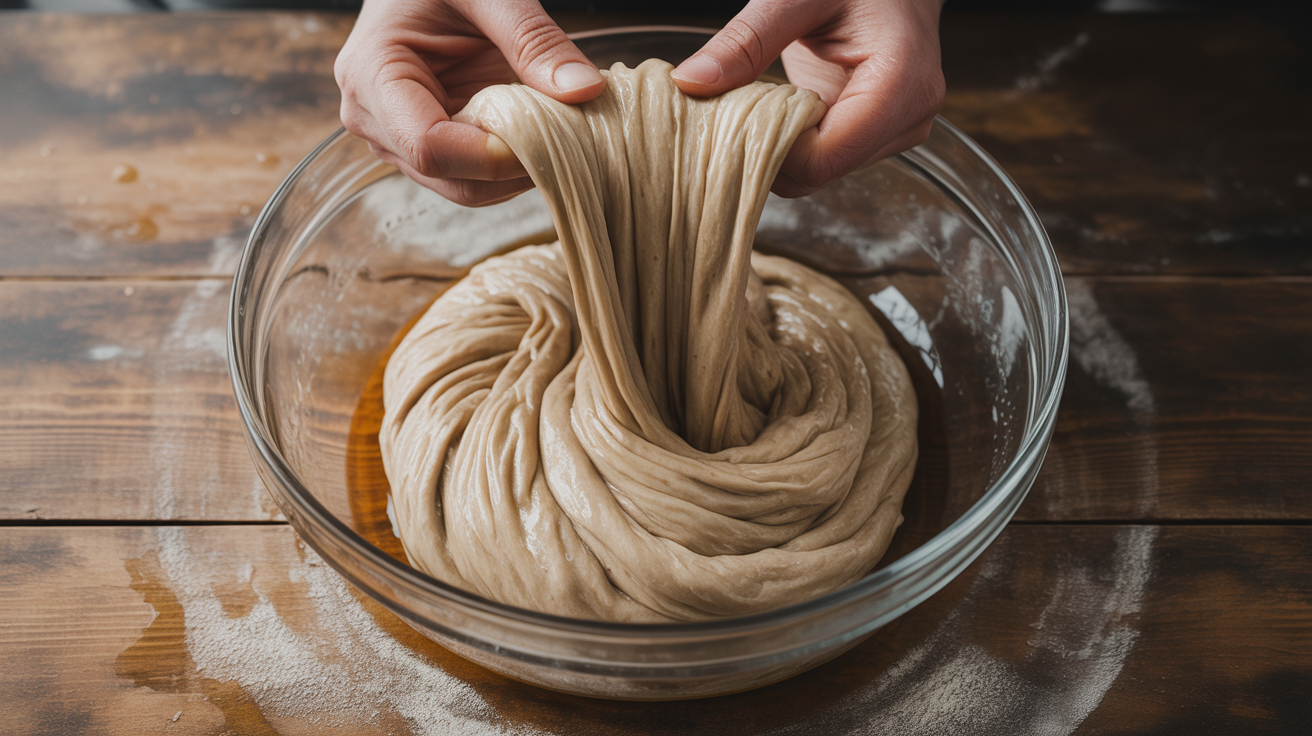
Step 2: Slap-Folds (After Adding Starter and Salt)
After autolyse, dimple in the starter and salt. Turn the dough onto a wet bench. Now do 5–10 minutes of slap-folds — the Richard Bertinet method:
- Pick up the dough by the edges closest to you (wet hands).
- Slap the far edge onto the bench.
- Fold the near edge over the top.
- Rotate 90° and repeat.
The dough will start as a sloppy mess and transform — after 200+ slap-folds it becomes smooth, elastic, and starts to pass a windowpane test. This is the big gluten development work you’re doing up front because stretch-and-folds alone won’t cut it.
Step 3: Coil-Folds (Every 30 Minutes, 4 Sets)
Stretch-and-folds tear high-hydration dough. Use coil-folds instead:
- Wet both hands.
- Slide your hands under the centre of the dough.
- Lift gently — the dough will stretch downward like a coiled rope.
- Set it back down so the ends fold under. The dough “coils” onto itself.
- Rotate the bowl 90° and repeat.
Coil-folds preserve gas structure (which matters for the open crumb) while still building tension. Do 4 sets at 30-minute intervals during bulk.
Step 4: Longer Bulk (30–40% More Time)
At 85%, more water means more enzyme activity means faster fermentation — but also more gas to hold. You need the gluten network to catch up. Plan for:
- At 24°C (75°F): 5–6 hours bulk (vs 4 at 75% hydration).
- At 26°C (79°F): 4–5 hours.
- At 28°C (82°F): 3.5–4 hours.
Check for a 50–80% rise (not full doubling), domed top, jiggly behaviour, and visible bubbles through the side of the container.
Step 5: Two-Stage Shaping
Dry-bench shaping doesn’t work at 85%. You’ll need wet bench shaping with two stages:
Pre-shape
- Turn dough onto a wet bench (not floured).
- Using a wet bench scraper, fold the edges into the middle four times.
- Flip seam-side down and use the scraper to gently rotate the dough against the bench, building surface tension.
- Rest uncovered 30 minutes so the surface dries slightly.
Final shape
- Lightly flour the top of the pre-shaped dough.
- Flip so the floured side is on the bench.
- Fold top-down, bottom-up, left-in, right-in.
- Roll toward you into a taut log or ball.
- Transfer seam-up into a heavily-floured banneton.
Step 6: Cold Retard Overnight
Cold retard is non-negotiable at 85%. Put the shaped dough in the fridge at 4°C for 12–16 hours. This:
- Firms the dough for clean scoring.
- Develops sourdough flavour.
- Slows final fermentation so you can bake on your schedule.
Bake directly from the fridge — don’t let it warm up.
Step 7: Bake at High Heat, Steam, Dutch Oven
- Pre-heat Dutch oven at 260°C (500°F) for 45–60 minutes.
- Score decisively — 85% dough is more forgiving of dramatic scoring.
- Lid on for 20 minutes, lid off for 20–25 minutes at 230°C (450°F).
- Internal temp should hit 96–99°C (205–210°F).
Common 85% Mistakes
- Skipping the slap-fold session: gluten never develops enough, dough flattens.
- Using stretch-and-folds: tears the delicate gluten network.
- Dry-bench shaping: dough sticks, tears, flattens.
- Skipping cold retard: dough too slack to score, spreads in oven.
- Using all-purpose flour: not enough protein to hold the water — stick with bread flour.
FAQ
Can I go higher than 85%?
Yes — ciabatta and pan de cristal run 90–95%. Same technique, but you’ll bake free-form rather than boule-shaped.
How do I know if my dough is strong enough for 85%?
Consistent windowpane test at 75% is your baseline. If your 75% dough windowpanes easily, you can attempt 85%.
Can I use a stand mixer for the slap-fold step?
Yes — 8 minutes of medium-speed mixing with the dough hook replaces the slap-fold session. Some bakers actually prefer this for consistency.
Why does my 85% loaf come out dense even with technique?
Almost always under-fermented. Higher hydration ferments faster — don’t use your 75% bulk time.
Next Steps
Don’t attempt 85% until you’re consistent at 75–78%. Practice coil-folds on a lower-hydration dough first so you know the motion. Use the ratio calculator to scale recipes, and pair with the DDT guide to nail fermentation temperatures — which matter even more at high hydration.